Growing up, who didn't dream of having a treehouse?
I know I certainly did, but, alas, the spindly fruit trees available to me at the time didn't offer much opportunity for even climbing, much less building. And that was when the term "treehouse" meant little more than a Calvin-and-Hobbes style pallet in a tree.
So when grandparents moved nearby into the Sierra foothills, I took the opportunity to live out some unfulfilled childhood dreams and build a treehouse for the Little Monkeys. This build took place over about a dozen weekends spread across two summers. I call it "Phase 1" because at this point, it is really just a supersized version of the pallet in a tree, with future plans dependent on how it ends up being used.
The first step was choosing a site. Luckily, the ideal spot appeared, practically screaming out for a treehouse. It had three large pine trees and one oak configured in a rough 12-foot square. It would be perfect for a 12x16 ft treehouse deck.
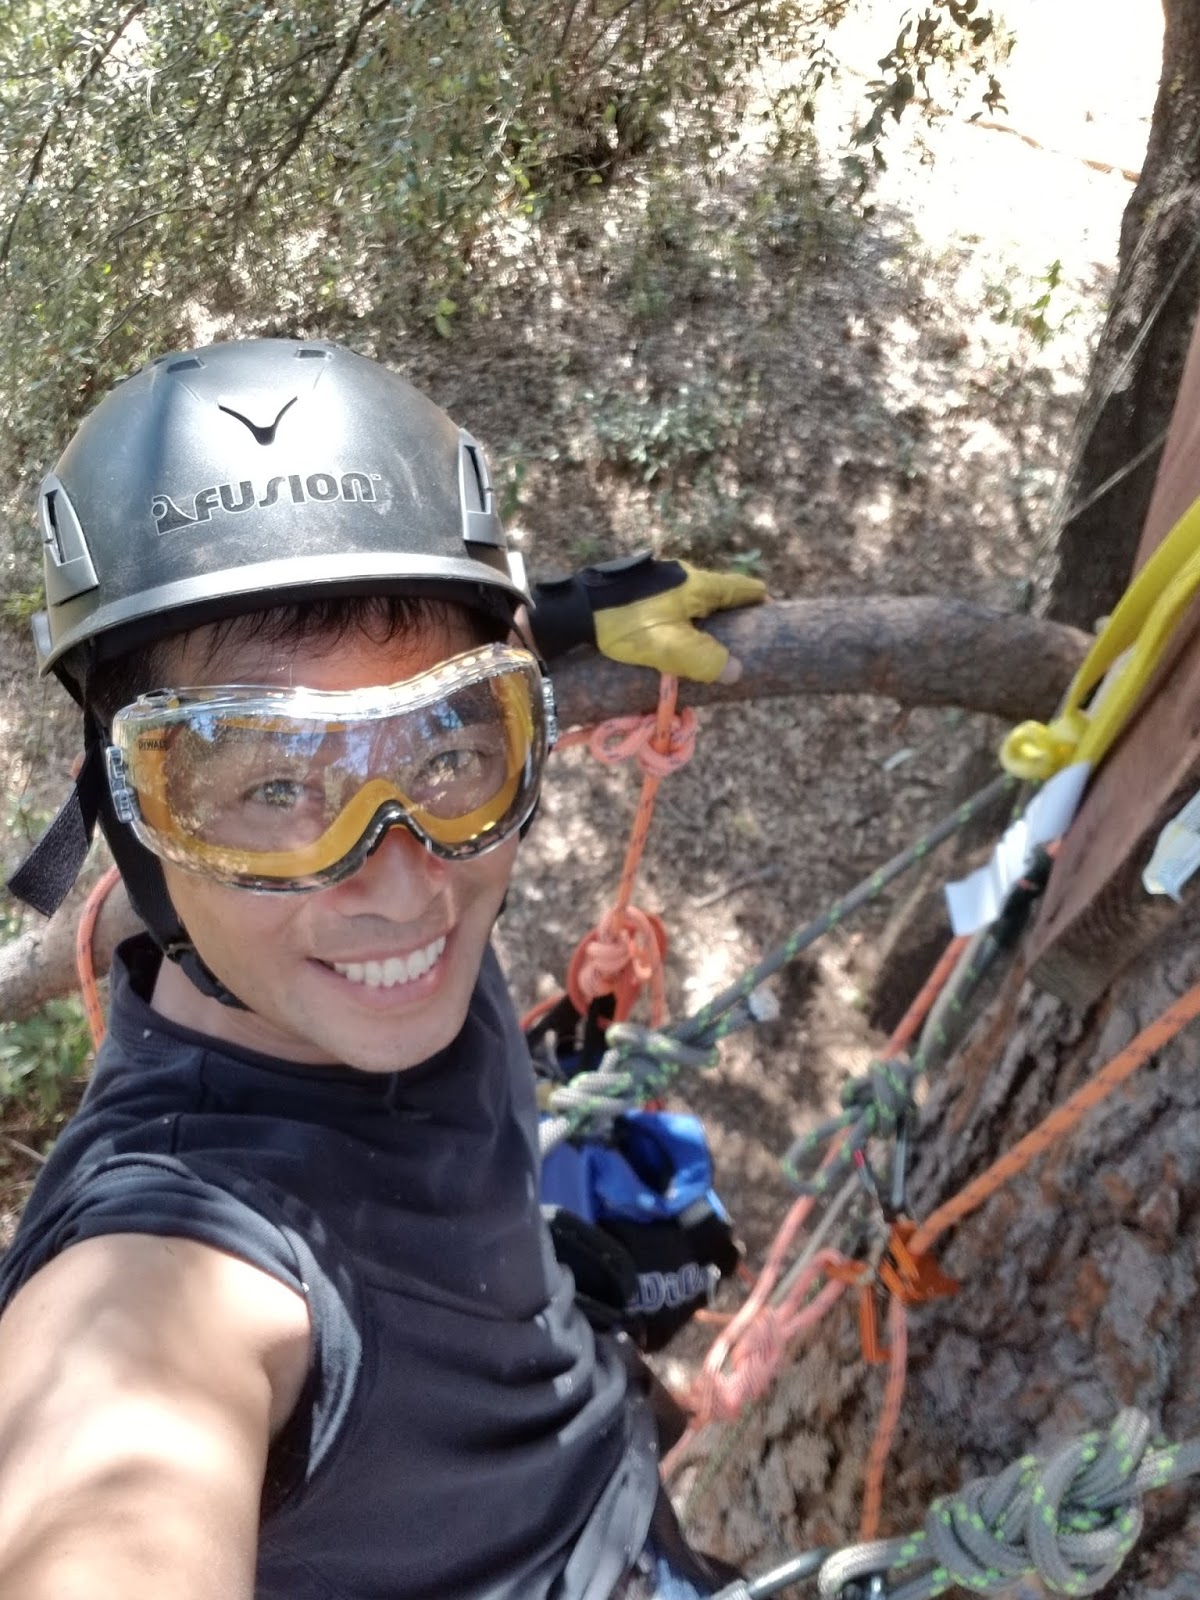
The problem, of course, was how to get up there. I put my gym climbing experience to good use, and assembled a tree climbing harness, ascender, ropes, and other assorted gear. This would let me get up the 10-14 feet height where the treehouse floor would be located.
All of the initial assembly was done from ropes, using compound pulleys fastened to adjoining trees to raise up the lumber.
To support the treehouse, the four trees were grouped into two pairs. Each pair would be straddled by two giant 16ft 2x12 pressure treated boards.
The boards were bolted into the tree with large lag bolts and spacing washers. One end of each board was drilled to accept the lag bolt, while a slot was routed out on the other end to hold a bolt but still allow some relative movement between the trees.
Initially, I used 3/4" bolts based on a recommendation from a treehouse building book, but later upgraded to 1 1/4" diameter bolts that I found on a treehouse-builder's website. Each one was rated to hold the weight of an RV, an order of magnitude more than I would need
With the initial boards up, more 2x12's were added on top to connect them and form the basis for a rectangular floor. The deck would be attached to one pair of support boards and alllowed to slide over the other pair to allow free movement of the trees in the other direction.
I hung 2x6 floor joints between the 2x12 main beams, still harnessed to ropes..
and framed around the inner trees to complete framing for the deck floor.
I rough cut deck boards from composite lumber and tacked them down in place. It was at this point that the Little Monkeys could make their first visit to the treehouse under construction. The railings and floors were still incomplete, but they were good to be careful where they stepped, as it was a long way down.
With the deck boards fastened in place and trimmed, the treehouse was actually starting to look kind of legit.
Up to this point, climbing up the treehouse required a slightly precarious trip up an aluminum ladder. Fortunately, I had a little help completing some proper stairs out of more 2x12 lumber.
Not bad so far. A rope railing is yet to come.
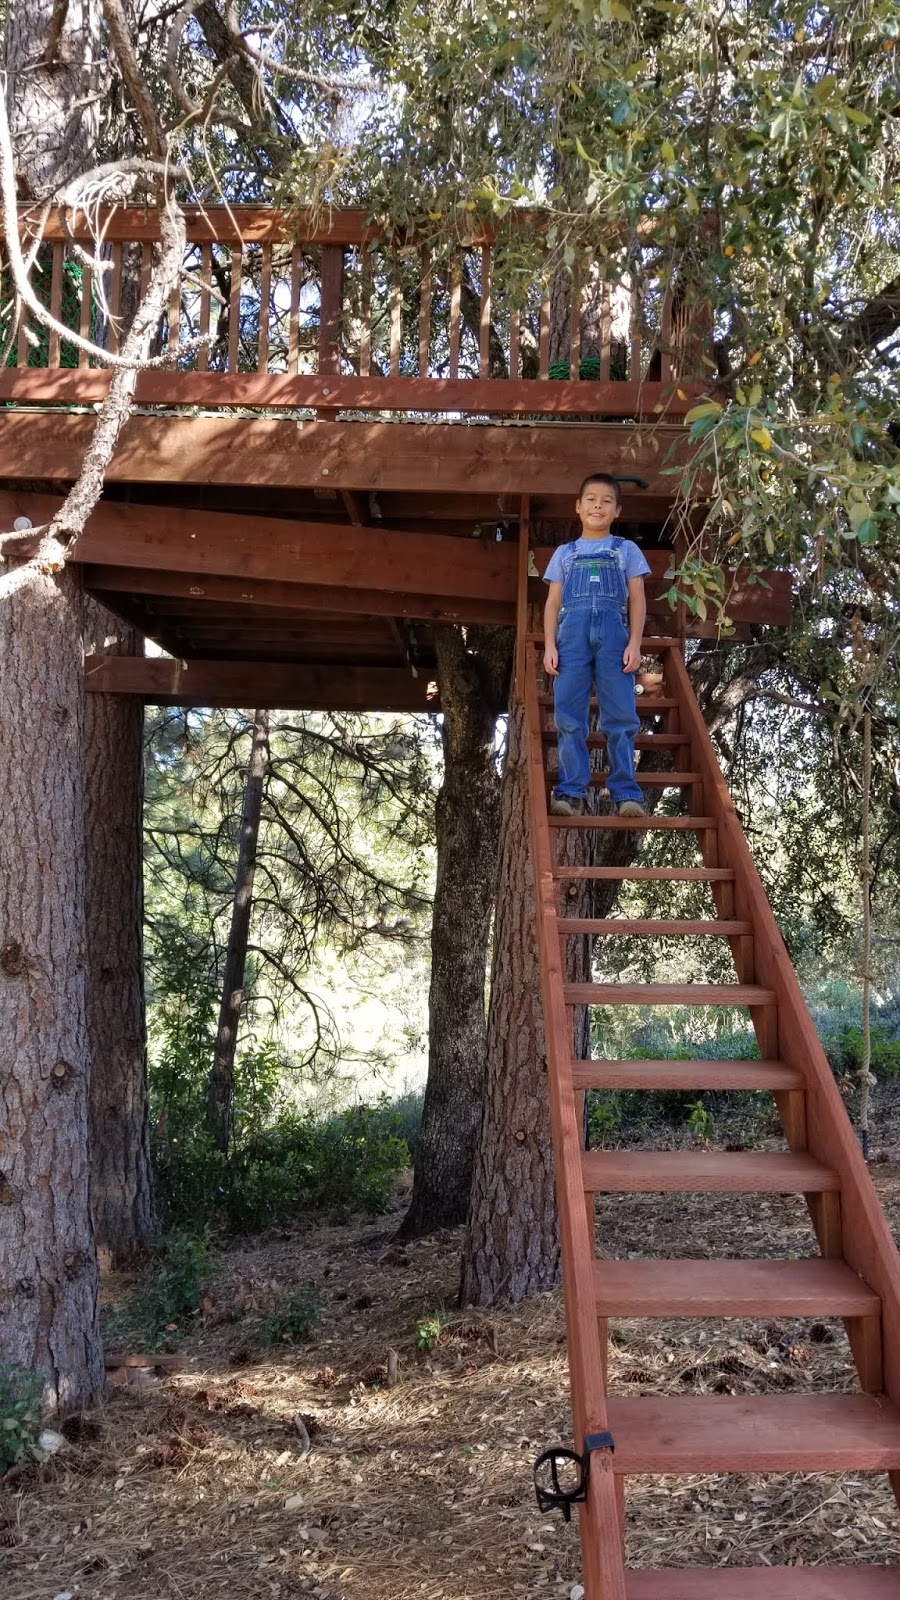
Finally composite railing was added to fully enclose the deck.
And here is the completed (more or less) product. Future additions may include some sort of shade structure or enclosure, but for now, the trees themselves provide plenty of cover from the sun even during the hot summer months.
The little monkeys are already eager to start constructing their own furnishings and additions.