|
| Littler Monkey in the Oven |
|
It all started last summer after reading an article in the June/July an issue of
Make Magazine. The story described the construction of a DIY outdoor barrel oven made from bricks, welded steel parts, and a 55-gallon drum. Able to bake bread, pizza, and other goodies from a wood burning file, such an oven seemed perfect for outdoor gatherings (keeping them outside!), and quickly made our short list for planned backyard additions.
This type of oven, known in Argentina as an "Horno Chileno", or Chilean Oven, is popular there for several advantages over traditional earthen ovens. Because typical clay or brick ovens work primarily off stored heat, they require 1-2 hours of firing to bring them up to temperature and require periodic re-firing between sessions to bring them up to temperature.
Chilean Ovens, on the other hand, are "mixed-mode" devices that use a metal drum to create an isolated cooking chamber. Since they operate over an open fire, they are much more efficient for occasional use, are ready to cook continuously in as little as 20 minutes, and can safely use scrap wood, paper, or even yard clippings for fuel.
 |
| Building the base |
|
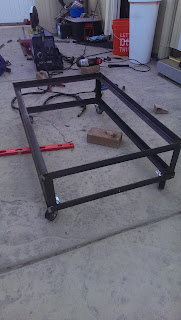
About six weeks ago, I was ready to start building, and created a base out of concrete block and brick. Bricklaying is a messy process (at least it is for a novice like me), but it was fun and easy to do. The most painful part is just obtaining the bricks in the first place. I used about 320 tan concrete bricks, which I hauled in numbeous repeated trips from two local OSH stores.
 |
| Building the firebox |
|
For additional heat resistance in areas directly next to the fire, I
used heat-resistant firebrick. Firebrick is much more expensive (and brittle) than clay or concrete brick, so I only used it where necessary, lining the firebox mortaring it together
with refractory (heat resistant) cement.
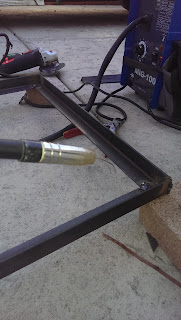
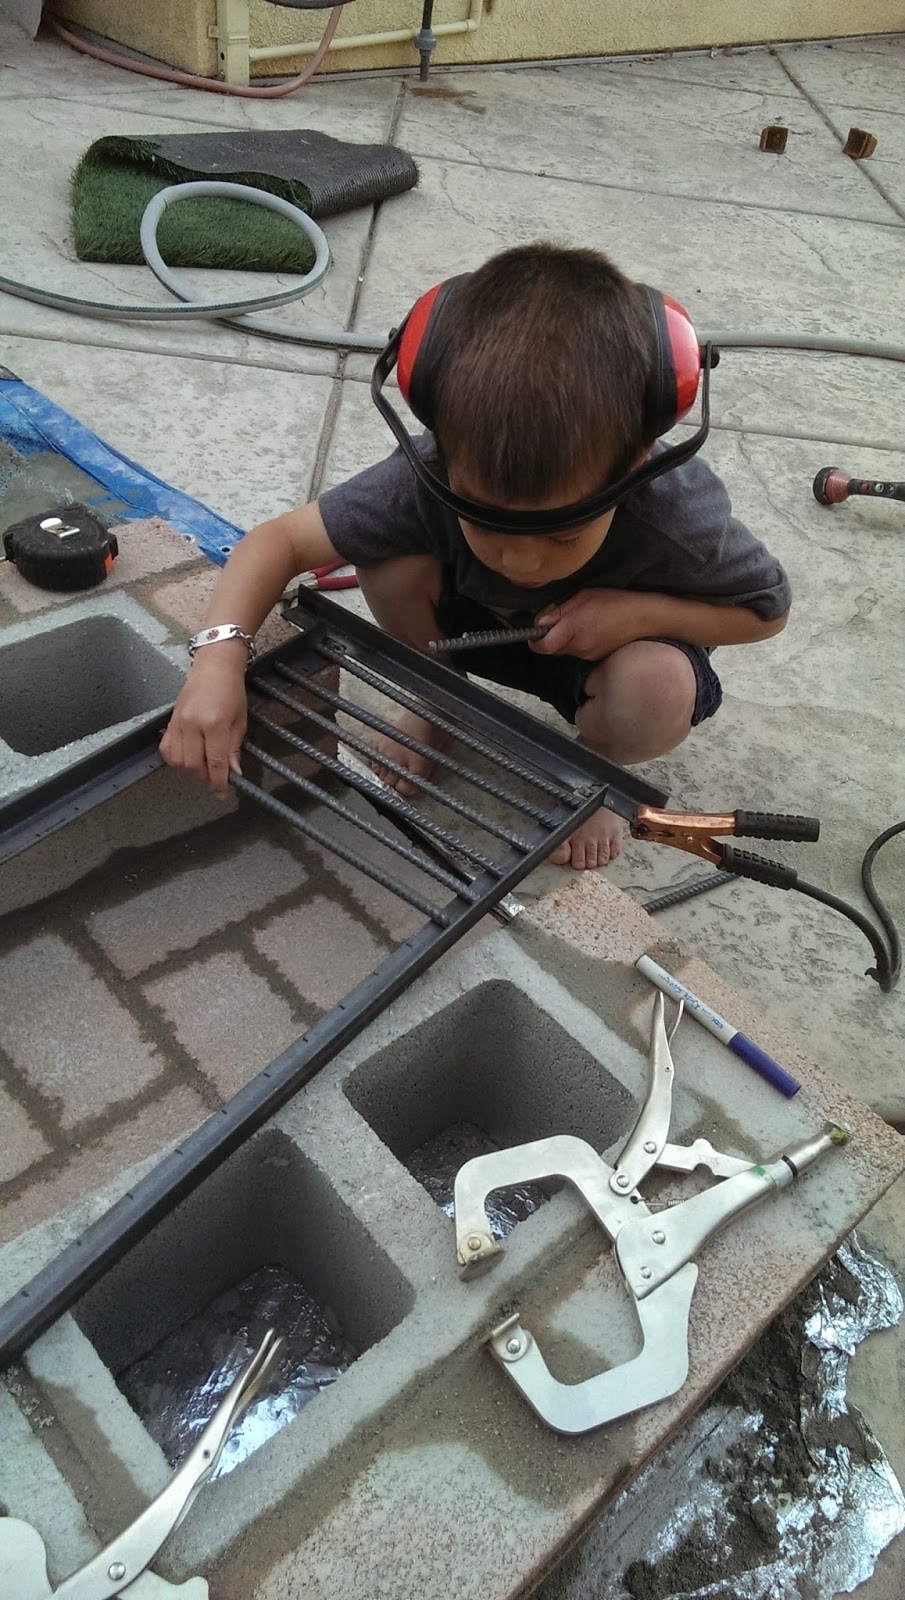
For the bottom of the firebox, my trusty assistant Little Monkey and I welded together a fire grate from rebar and angle iron. This would support the burning wood.

|
| Welding fire grate |
|
 |
| Fire grate installed |
|
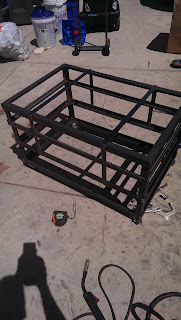
Little did I know that with the partially built brick structure and all the mortar that needed cleaning up that we were also creating the World's Coolest construction toy playhouse.
 |
| Construction worker on the job |
For the cooking vessel, I scoured Craigslist andgot a $30 55-gallon drum that stored cooking oil in a former life. I took it to an auto shop to sandblast the insides clean of paint, as food with paint fumes didn't sound very yummy.
To support the baked goods, I found two large industrial oven racks on eBay that I could bend to fit. Each rack provided a generous 33" x 19" of cooking space, and fit almost perfectly inside, though I had to weld an extra inch of length to the barrel top to give them enough space. I secured them with stainless steel bolts and nuts.
 |
| Oven racks |
|
 |
| Aka toy storage |
|
|
 |
| Building the vaulted top |
|
Now the tricky part. For the vaulted arch, I mortared brick into the rounded shape using a framework of 2x4 cribbing supported by the barrel. These temporary supports--when removed--would form an air gap where heated exhaust gases can warm the barrel on their way out to the exhaust chimney on top.
My new good friend Amazon Prime provided the parts for the chimney, including a 6" galvanized pipe, fire safe exhaust cap, and cast iron damper.
While the magazine article provided good general guidance, it lacked specific instructions in many areas, especially in the regards to the metalwork. Fortunately, the absence of exact requirements left ample room for blissful improvisation and it's evil companion Online Shopping.
 |
| Ready to use drum lid |
 |
| Insulating oven door |
The oven front was biggest metal part requiring fabrication. The design required a heavy hinged door with a rest stop mounted to a form-fitting ring attached to open end of the barrel.
Surprisingly, I found an amazing shortcut in the
Bustin Waste Drum Cover. Complete with a naturally heat-resistant powdercoat finish, it almost exactly matched the carefully constructed metalwork in the article. All I needed to do to complete it was to paint it black, add a spring grip to the handle, and insulate the inside with ceramic batting and an inner wall I fashioned from the old drum lid.
For the fire door, I found a ready-made fireplace cleanout door,
fashioning a simple locking handle of of bar steel to complete it.
Similarly, for the cleanout, I used an existing metal air register
as an air grille, adding a tray formed from galvanized sheetmetal as an ash
drawer. Both looked better than anything I could fashion from scratch myself. Thanks again Amazon Prime!
 |
| Fire door |
|
 |
| Ash drawer |
|
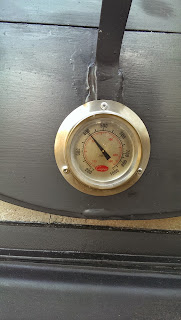 |
| Door thermometer |
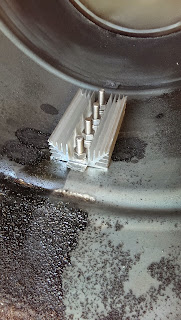 |
| Inside heat sink |
For finishing touches, I added a thermometer to the door and, after a
test firing, added large heat sinks to the inner and outer bottom surface of
the drum with the thought of increasing heat conduction performance and air circulation.
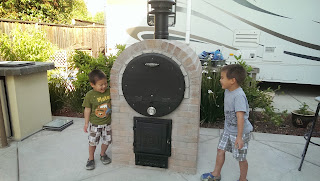
Here is the completed oven. Once put together, IMHO it looks fairly legit.
 |
| All hail Smoko, the Chilean |
It's taken a couple of firings work out some initial bugs. For instance, initially I didn't leave enough expansion space around the barrel front and this caused a little expansion cracking when brought fully up to temperature. Wood fires are also very sooty, and I had go back and seal the fire door and barrel surround with silicone to better contain the smoke. Lastly, while I kept the original chimney height short for aesthetics, getting smoke blown in our faces was fairly fun-free, necessitating extending its height a little bit.
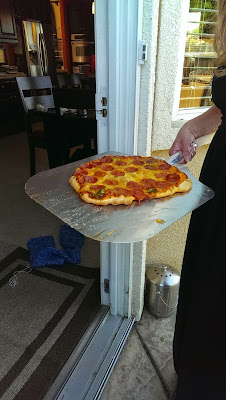
We've also learned a few tricks, such as first building a good fire and waiting for it burn down to hot coals before cooking. That's when we've seen the oven reach its hottest temperatures, around 600 degrees F, perfect for crispy pizza. We've also heard that hardwood burns much cleaner and longer than softwoods, so we're looking forward to trying that.
We're still learning how to best take advantage our new Chilean friend, but are sure it will continue to be a hit for many summers to come.

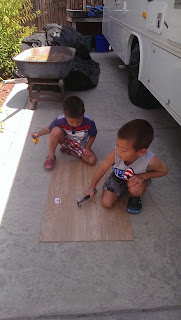
 To anchor the holds, I created a template in scrap wood, and the Little
Monkeys and I used it to mark out and drill mounting holes in the plywood, laying
them out in a modified 8-inch grid pattern with every other row staggered sideways by
half a column width.
To anchor the holds, I created a template in scrap wood, and the Little
Monkeys and I used it to mark out and drill mounting holes in the plywood, laying
them out in a modified 8-inch grid pattern with every other row staggered sideways by
half a column width. To give it a nice grippy rock-like appearance, I bought a gallon of
DeckOver textured deck coating in a dark gray color. Since this stuff is
normally used to repair damaged decks, I figured it would be perfect to
both protect the wall and give it the durable surface for climbing. The
stuff is really neat and unbelievably thick. It fills in cracks and crevices (enhancing the "rock" feel), and goes on more like drywall compound than ordinary paint.
To give it a nice grippy rock-like appearance, I bought a gallon of
DeckOver textured deck coating in a dark gray color. Since this stuff is
normally used to repair damaged decks, I figured it would be perfect to
both protect the wall and give it the durable surface for climbing. The
stuff is really neat and unbelievably thick. It fills in cracks and crevices (enhancing the "rock" feel), and goes on more like drywall compound than ordinary paint.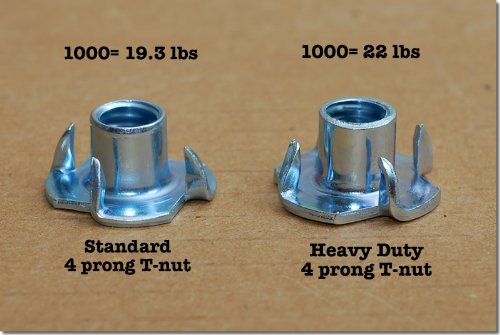
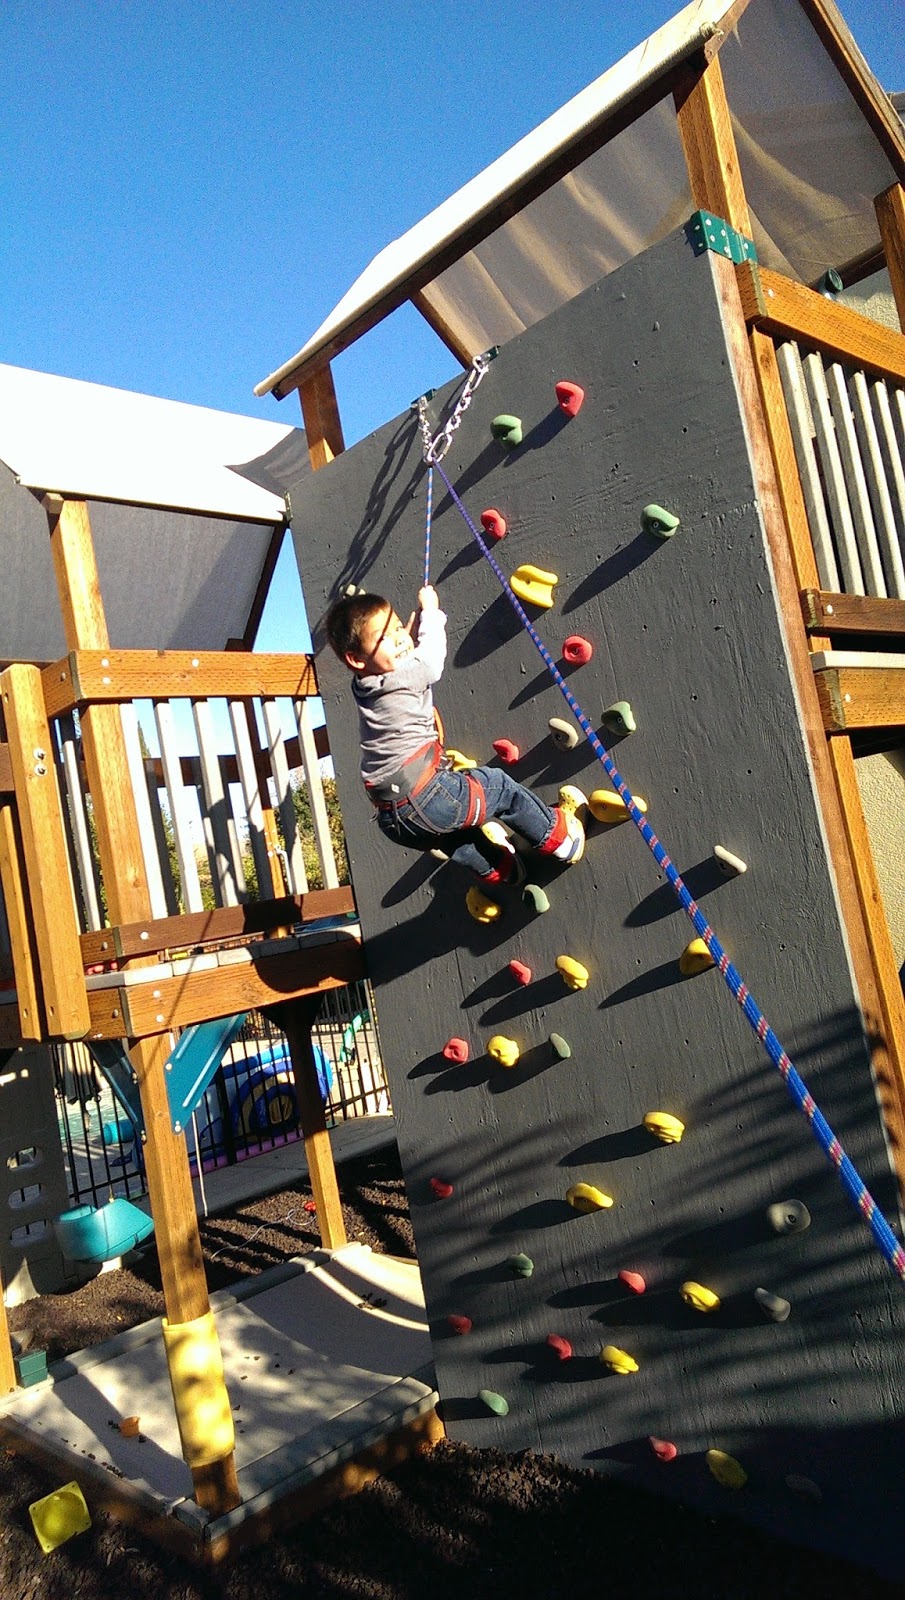
 Into the holes, we hammered in stainless steel T-nuts from the backside of the wall. These would be used later to fasten holds to the wall with 2-inch stainless hex bolts.
 Genuine climbing holds are easy to find on eBay. I found a colorful assortment of 40 beginner-level "bolt-on" holds that fit the bill for about $70. After mounting them to the wall, we were ready for some test climbing.